Oftentimes (and particularly in very specific niches), you won’t find very many events that are ideal for you. But this is actually a blessing in disguise.
Why? Because you are now in a position to host networking events for a niche that clearly exists, but is currently unsatisfied.
Now, there are certain caveats to consider, and some logistical hurdles to overcome, but we’re going to tackle them all in this section.
Here’s how we’re going to handle this chapter:
- We’ll outline when you should host your own networking event.
- We’ll discuss how to choose an appropriate format and topic.
- We’ll talk about how to find a location for your event.
- I’ll give you some tips on how to get people to attend your events.
Let’s get started!
When Should I Do This?
So the primary concern here that it takes much more time and effort to host your own events than simply attending them. The question then becomes: when should I invest?
The answer to the question is simple. If you answer “yes” to the following three questions, then go for it:
- Do you have something interesting to share with the community?
- Is there a significant local community that would benefit from the event?
- Is there no event like this yet? (Alternatively: can you do better than the current event?)
Notice how there is no criteria related to the logistics of your event (location, time, etc.). This is because I’m going to walk you through all of that later in this post.
| What If I Answered “No”?
If you answered “No” to any of the questions above, simply do this:
- If you answered no two or more…
-
- Reconsider hosting your own event, or change the content of the event to better suit your audience.
- If you answered no to one of them…
-
- You can probably still host your own event, just make sure that you differentiate from the competition and provide a ton of genuine value!
| Advantages & Disadvantages
When hosting your own event, it’s important to keep focused on the “why”. Here’s a quick list of advantages and disadvantages to hosting your own events that you should keep in mind:
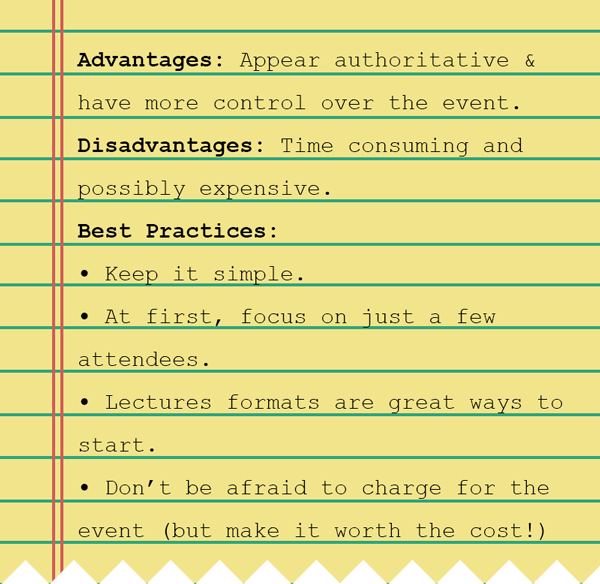
Just simply keep these in mind when making your decisions.
Overall, I’d recommend that more often than not that you do host your own event (as long as you make it just as valuable), but it’s not the right decision for everyone.
The remainder of this guide will assume that you’re going to host your own event. Let’s press on to logistics!
Choosing a Format & Topic
So the natural first step in hosting your own event is deciding on a format (lecture, mixer, food, referral engine, etc.) and a topic (the purpose of the event).
| The Format
When choosing a format, think back to the business goal we defined earlier:
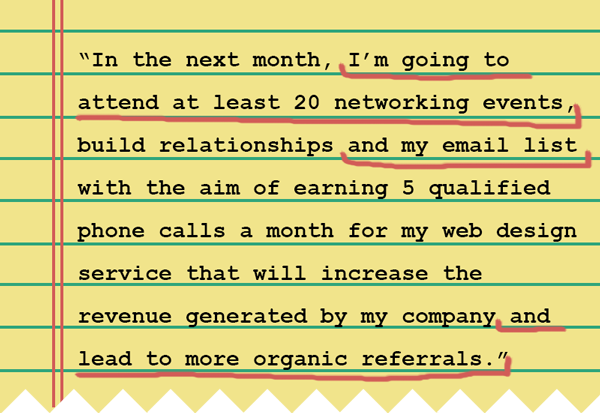
There are some key takeaways from this goal that we should consider:
- We need to build relationships.
- The aim is to get more work (eventually).
- There is a secondary concern of filling an email list.
Building relationships requires you to be trusted, and to have a conversation with your prospects. A lecture format with a mixer component would be ideal here.
Getting more work would require you to be in a position of trust and authority. A lecture format would be ideal again here.
Filling the email list would require both authority and the ability to interact with prospects, so the lecture and mixer components again make sense here.
The format is now clear: host a lecture with a 15-30 minute mixer afterwards. Incorporate this with food to increase effectiveness if the budget permits it.
Call to Action: Do the same for your business goal! Leave a comment below if you’d like some help.
| The Topic
Next, we need to come up with a topic. Stepping back to the goal…
We see that the goal is to obtain 5 phone calls / month for web design services. So, the audience we need to attract can be defined as follows:

Let’s get very specific here, because we don’t want any room for ambiguity when we pick topics:
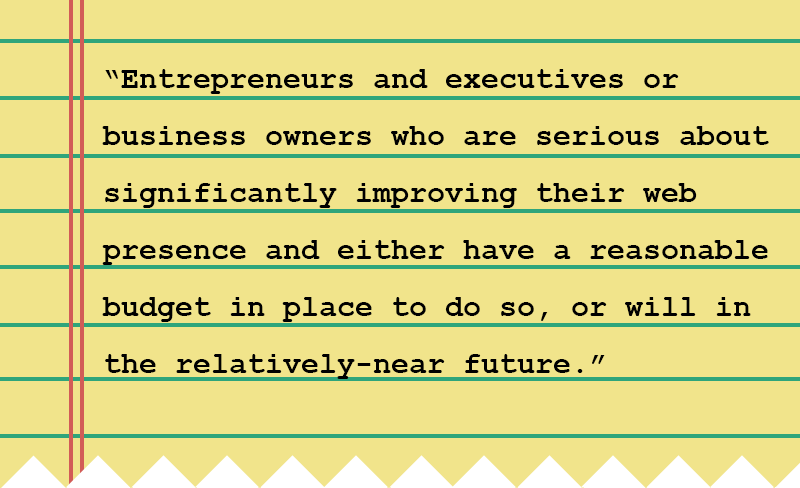
I’m going to take a moment to clarify that the budget distinction there is incredibly-important. It’s very easy to get in front of people that are interested in your services (especially when your services are top notch), but it’s a different story to get them to buy from you.
If, right out the gate, they’re just kicking tires or testing the waters, you’re going to waste quite a bit of your precious time talking and hardly any walking to the bank to pay your bills.
The key takeaway is this: make sure you are always targeting people who are legitimately serious about making a purchase either today or sometime in the future. I’ve seen way too many business owners neglect this and get burned.
Alright, so back on track here, we now have a well-defined customer: the next step is finding out what she wants to hear. This is where mind-mapping comes into play.
1. Write your primary value proposition in the middle of a piece of paper.

2. Expand on this by writing related topics as “branches” coming out from the primary value proposition.
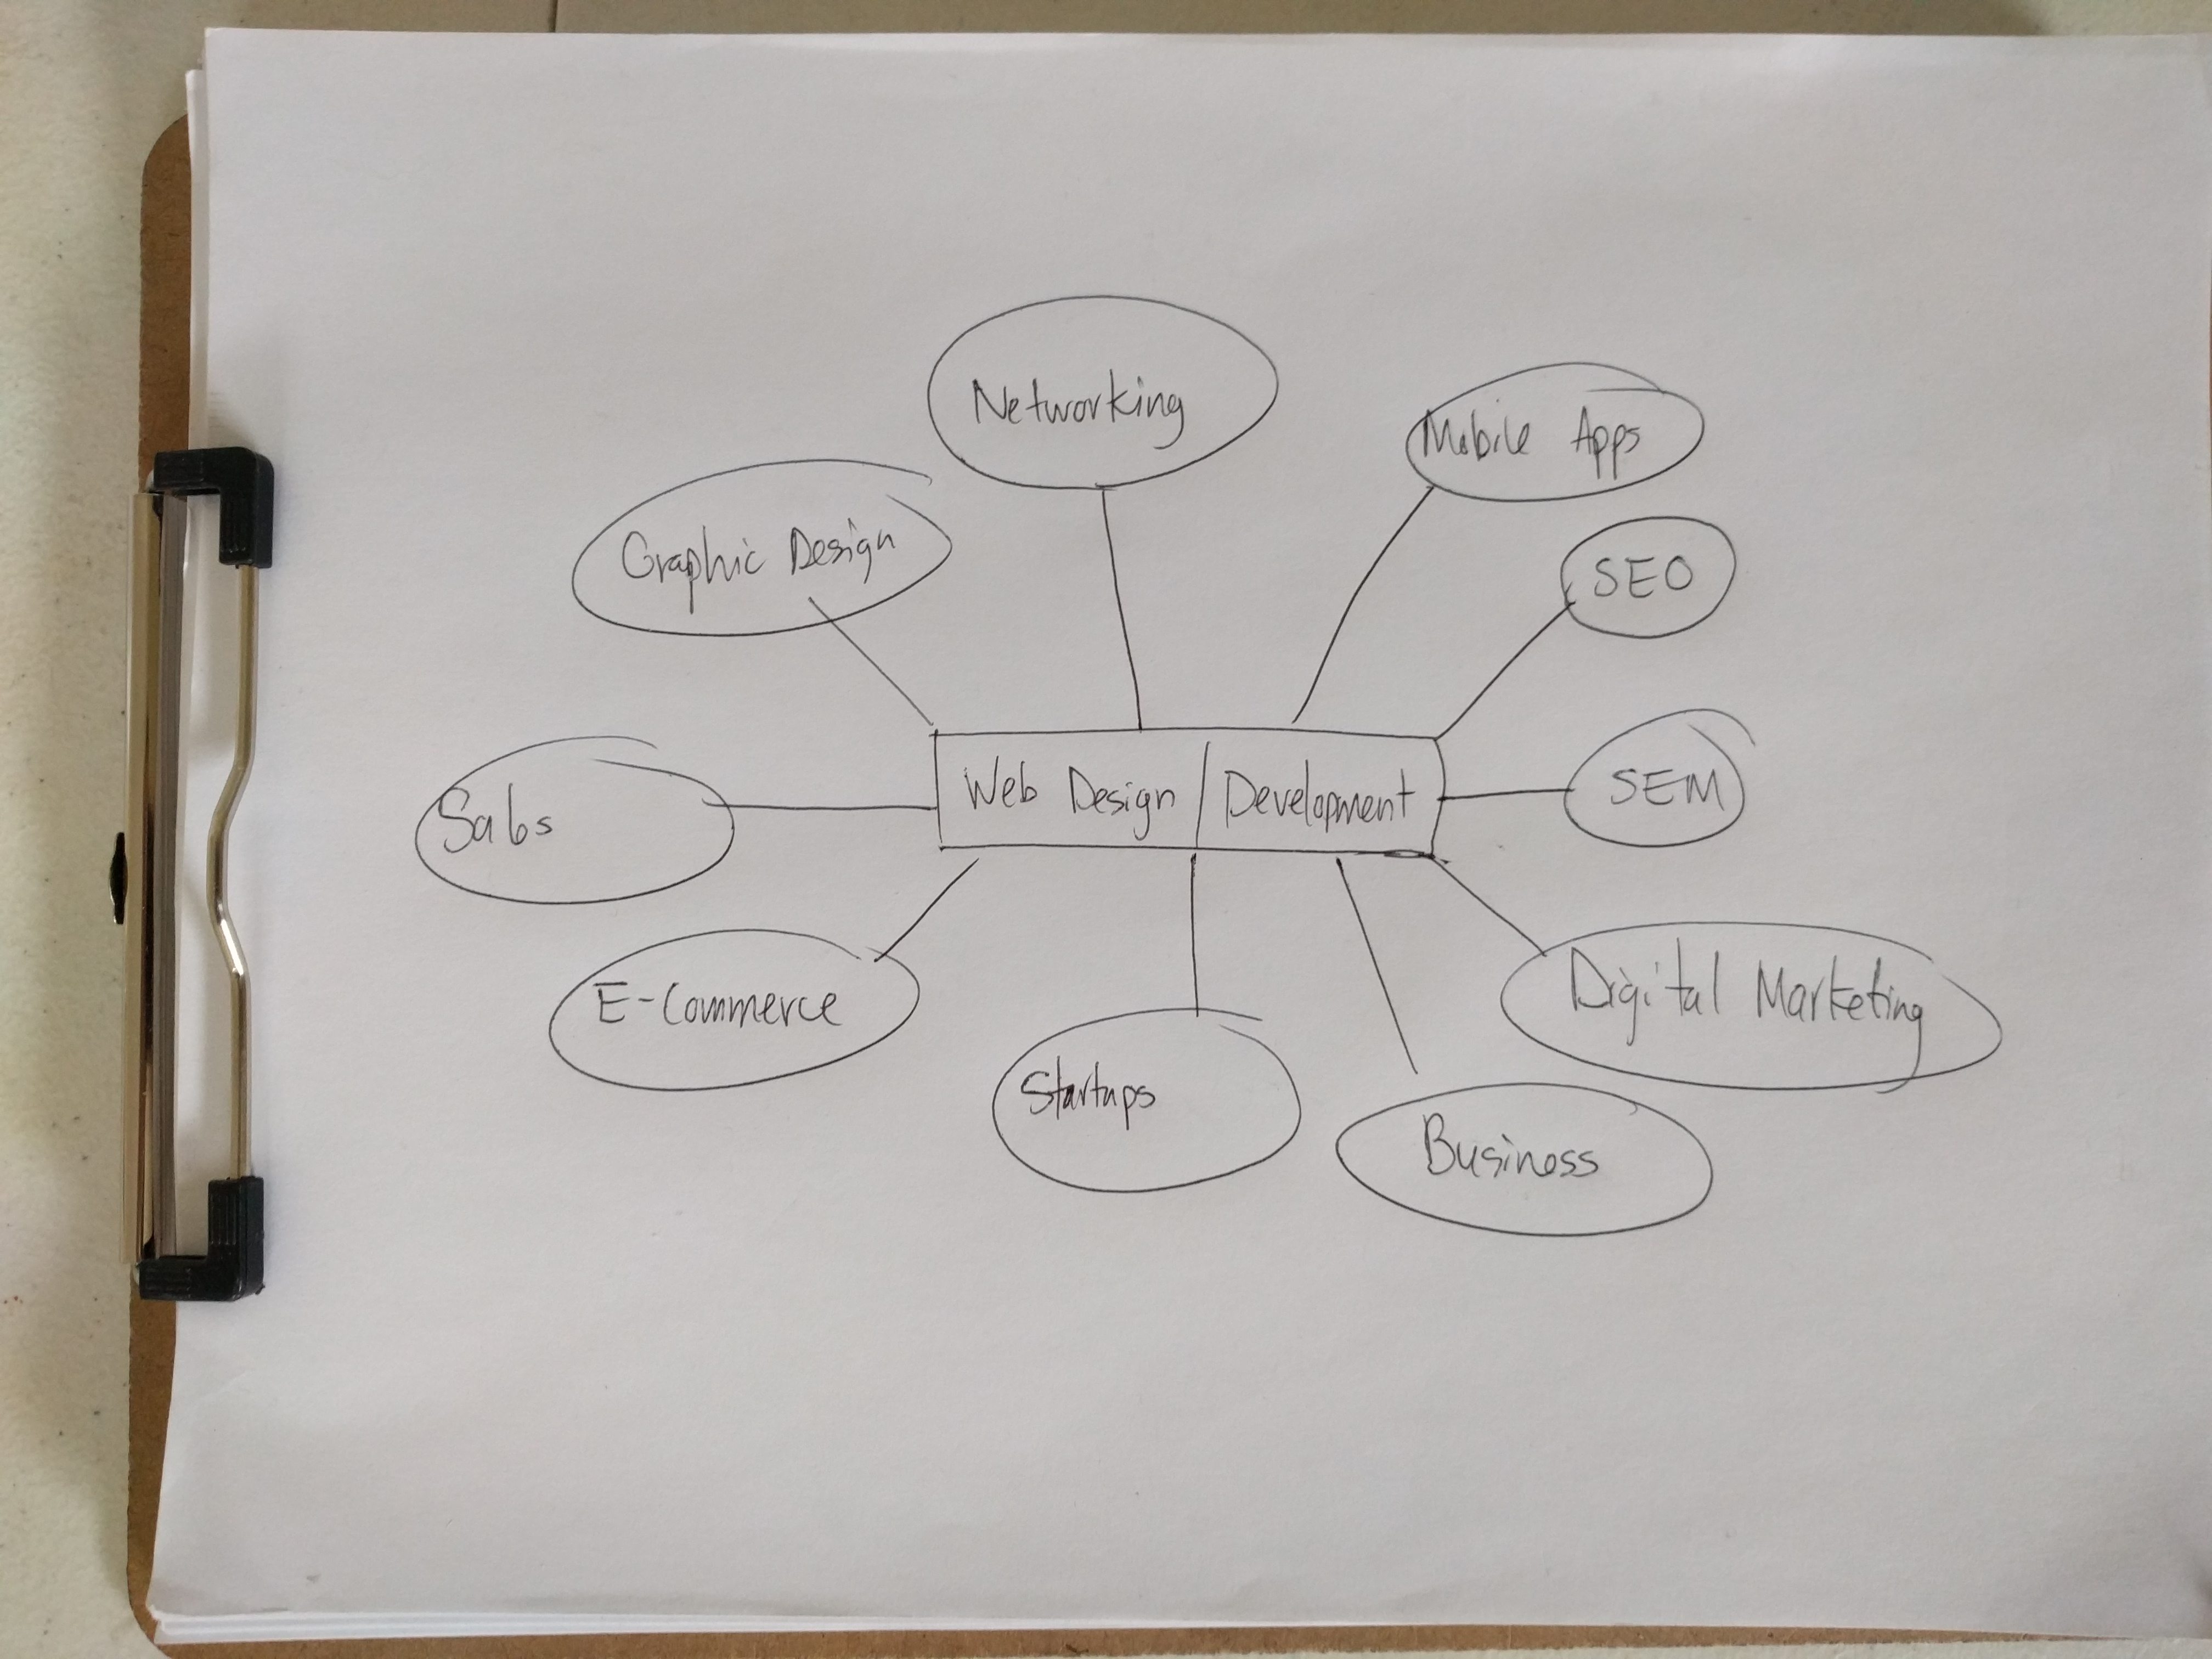
3. Repeat for each branch until you’re out of ideas (don’t censor yourself here, you’re just getting ideas down on paper).
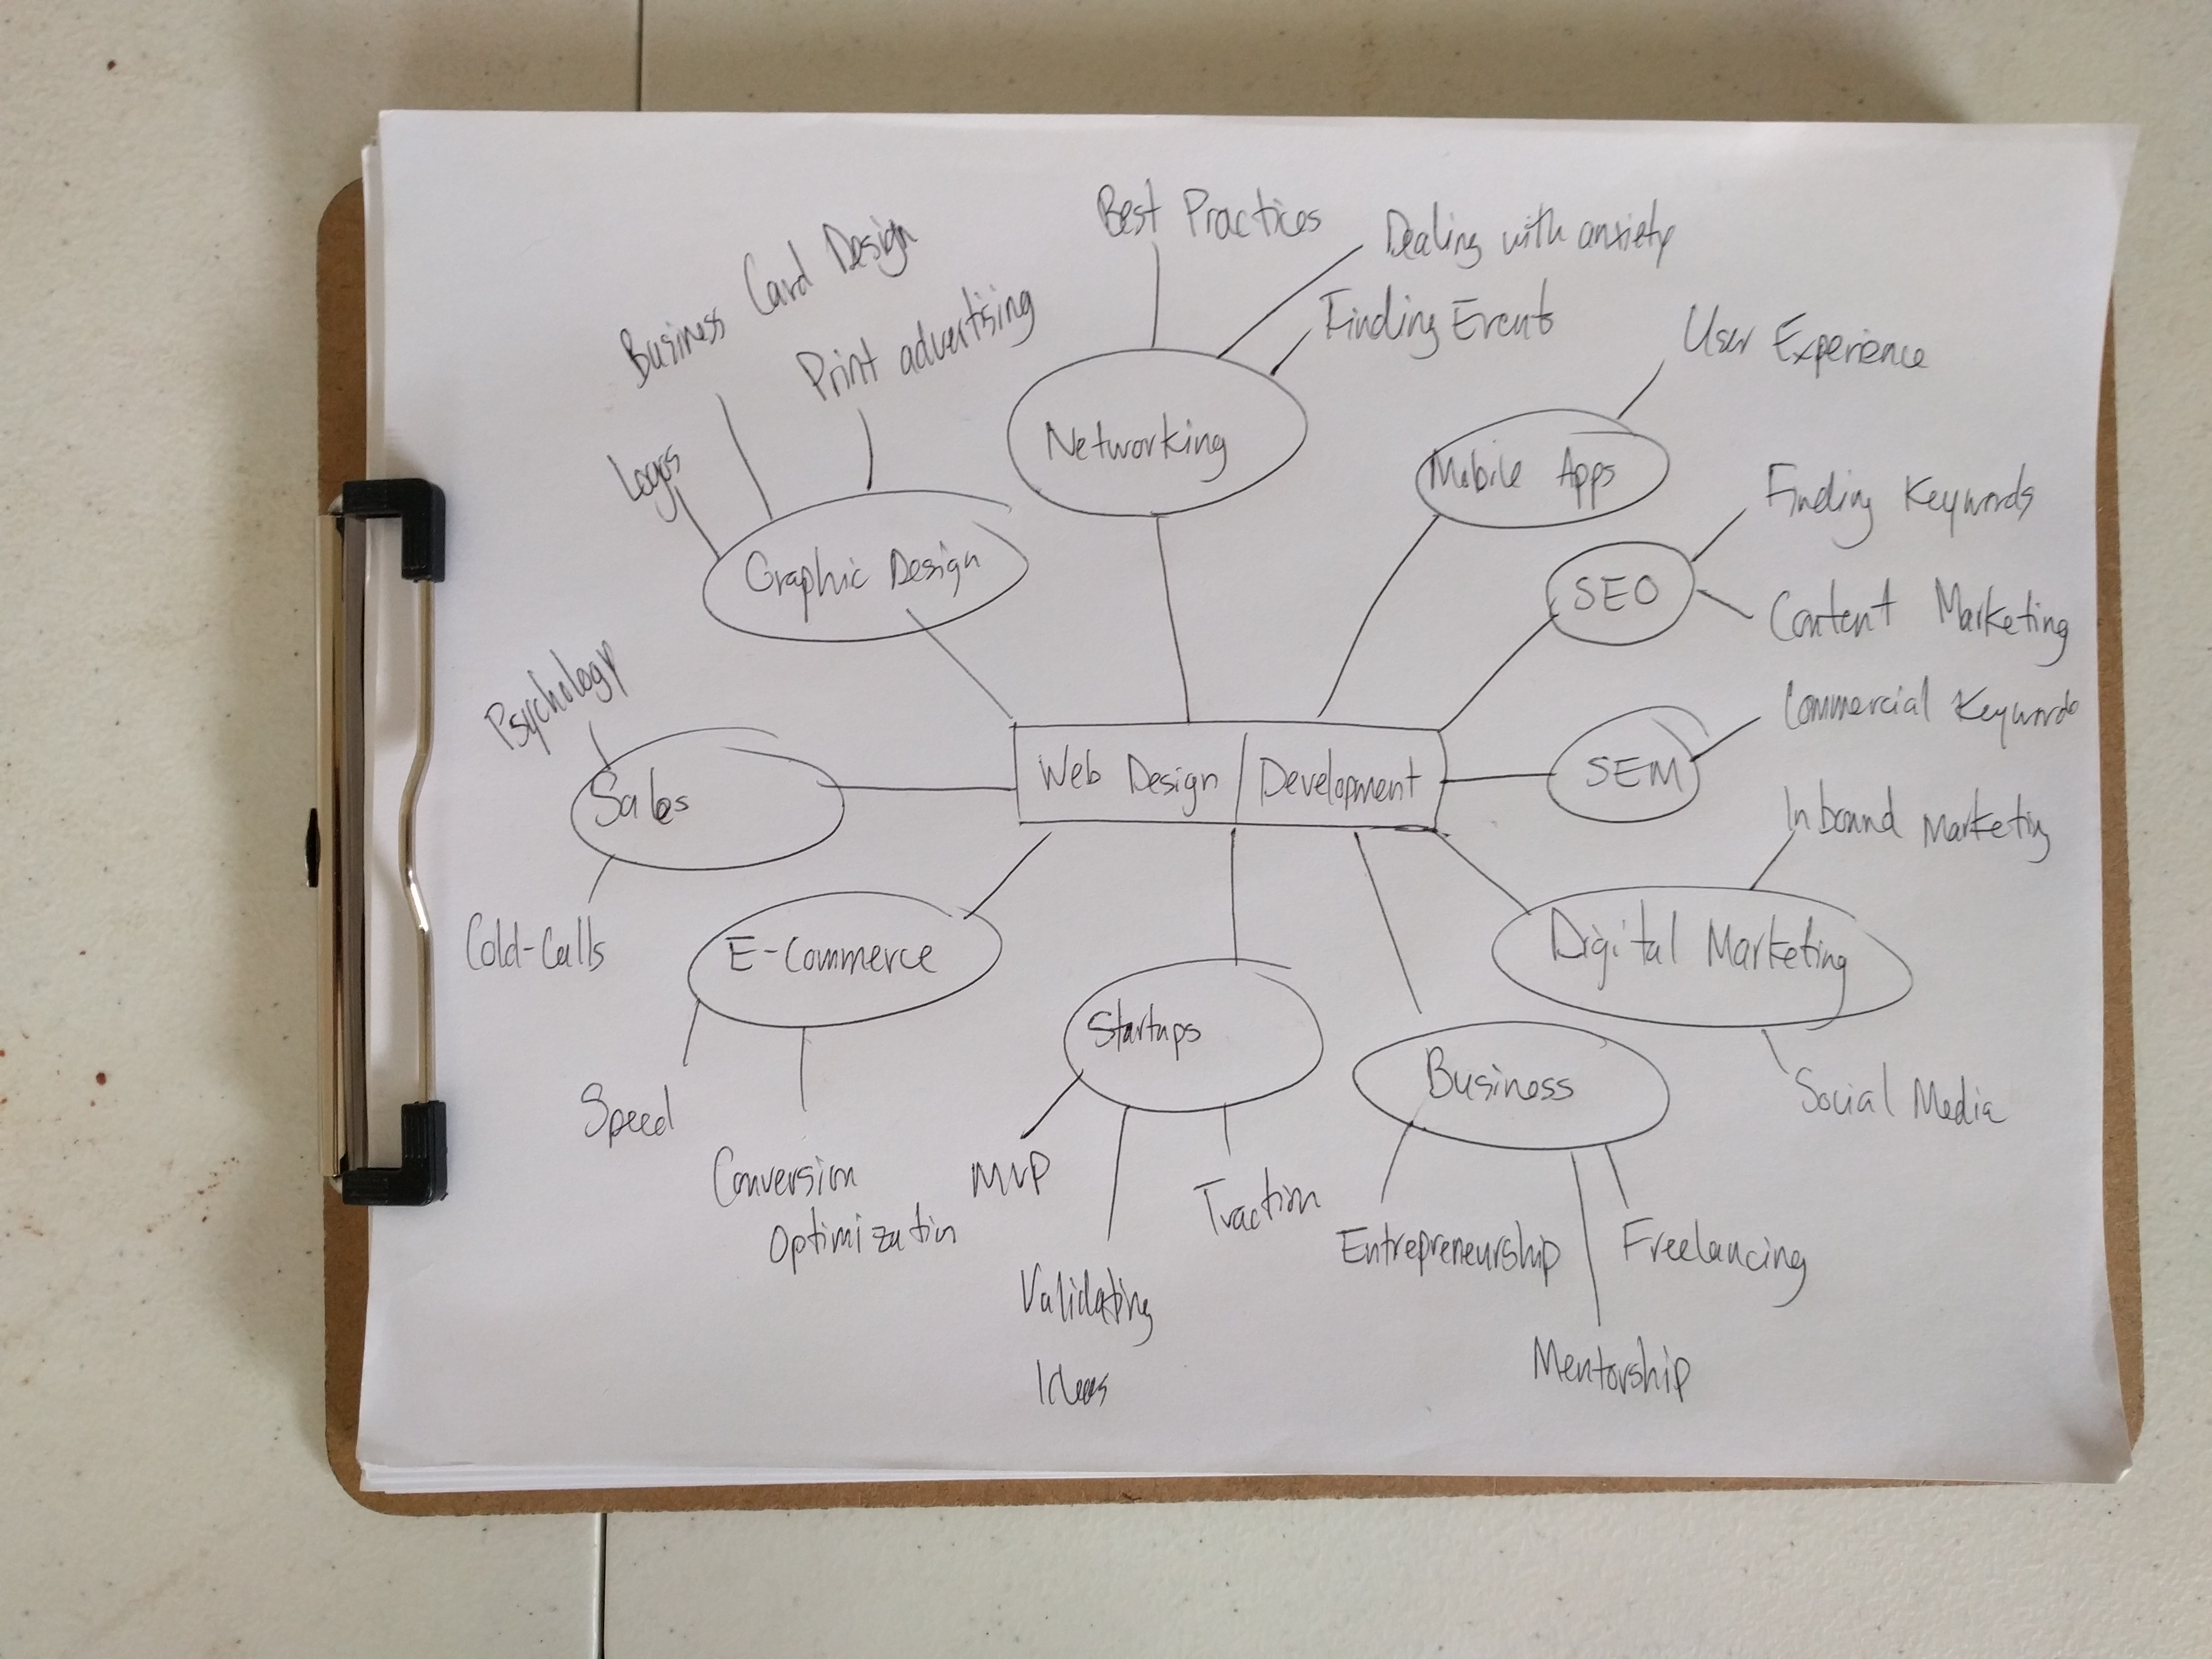
Alright, so now we have a huge list of potential relevant topics. At this point, you can do one of 2 things:
- If you just want to get going, pick one of the topics and continue through this post.
- If you want to vet your topics, head over to Google Trends and see which ones are currently buzzing out there.
In my example, we see “e-commerce” and “business” in the map. Let’s spin this into something relevant to my audience:
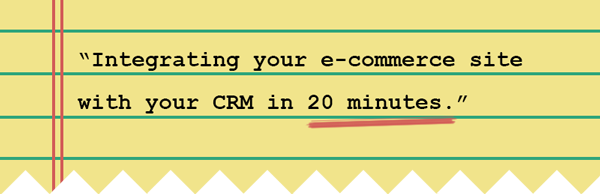
Catchy, simple, and full of value.
Here’s the criteria I use for coming up with a good topic: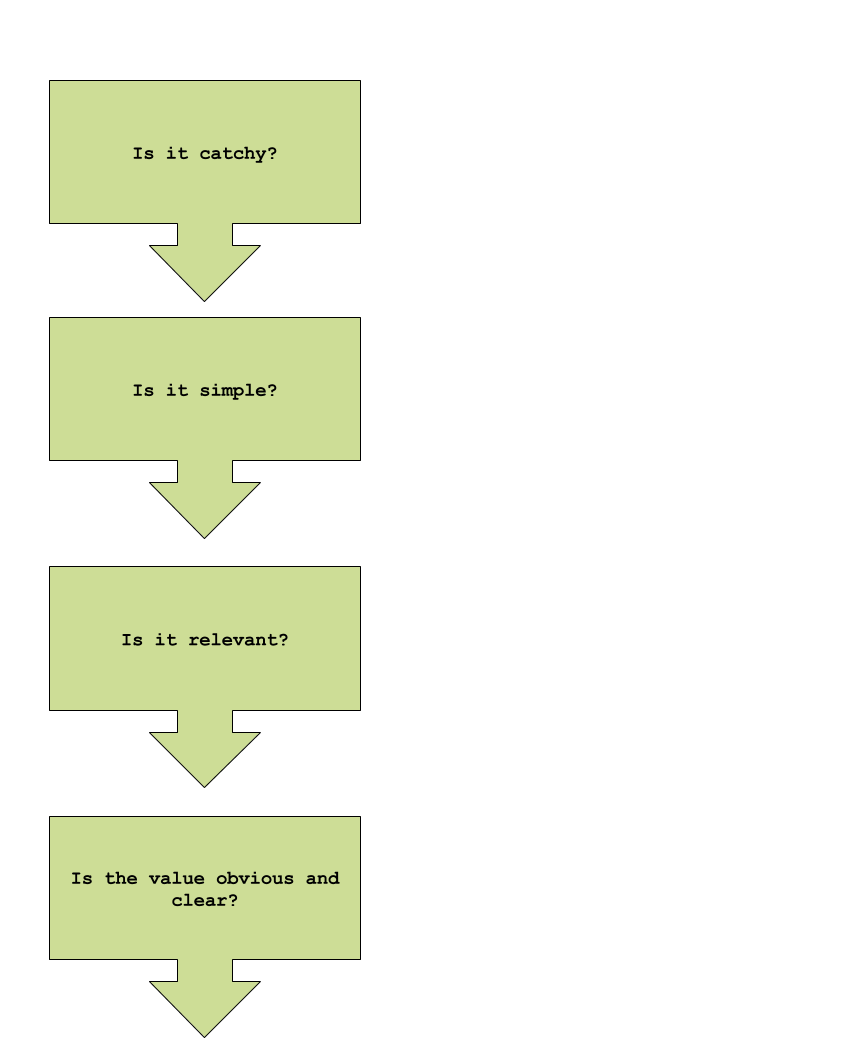
This topic would certainly attract my target audience, and it meets the above criteria, so I’ll greenlight this event.
The “Quick & Easy” Solution
All in all, it’s very easy to get bogged down in the details here, so if you find yourself getting stuck in “analysis paralysis”, just keep it simple.
I recommend: hosting a monthly event where you (1) teach others about a topic relevant to their interests, (2) host a quick Q&A session, and (3) do something creative and memorable.
Finding a Location
Once you have a format & topic ready, it’s time to get a location!
This is where most people opt-out of hosting their own event, usually because they start to think it’s too expensive. We’re going to take an honest approach at answering that question in this section.
| Some Free Options
Here’s what you can do for free:
- Host at a coffee shop (works best for mixers).
- Host at a restaurant (again, works best for mixers).
- Host at a local library (usually free, just need a library card).
- If you have office space, host in one of your conference rooms.
- Ask regular attendees if they’d be open to hosting an event at their space.
- In the summer, you can simply host your event in a public park!
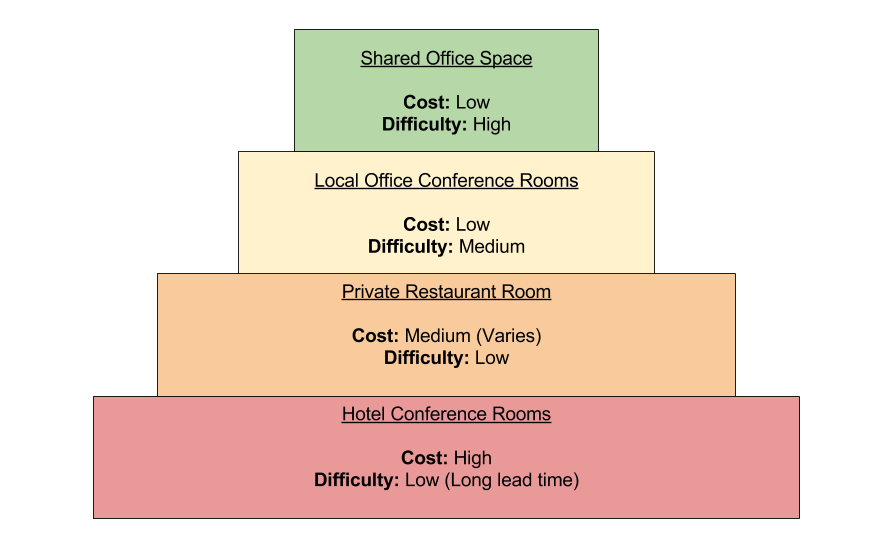
| Traditional Locations
If you have some capital to host the event, here are some of the more traditional options:
| Atlanta-Specific Locations
You can usually talk to the office managers at the following places and reserve a room for free (for an hour):
Keep in mind, you can always charge your guests for attendance to afford a more appropriate meeting space (this is very effective if you’re targeting corporate clients).
Finally, be sure to pick a location that makes sense for your overall business goal (see how important this goal is?).
Getting People to Attend
The last piece of the puzzle: actually getting people to attend!
There are many different tactics that we’ll leverage to boost attendance, but the most important point to remember is this: it’s going to be hard to get people to attend at first, but don’t let that discourage you!
We’ll start by leveraging the simplest strategies, and move on to the more difficult ones.
Let’s jump right in and see what we can do to get bodies in those chairs…
| Event Aggregators (Meetup & Eventbrite)
The first step in getting your event in place is creating your event in Meetup and in Eventbrite.
Here’s what the process currently looks like for Meetup.com:
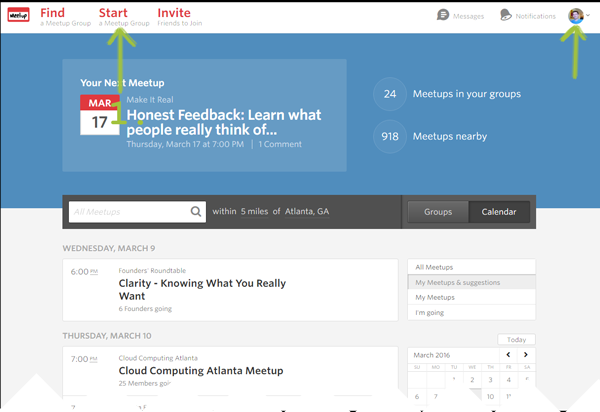
1. After navigating to meetup.com, click on “Start” on the navigation section.
Note: As you can see here, I’m logged in. You’ll need to make your own account before you can host on meetup.com!
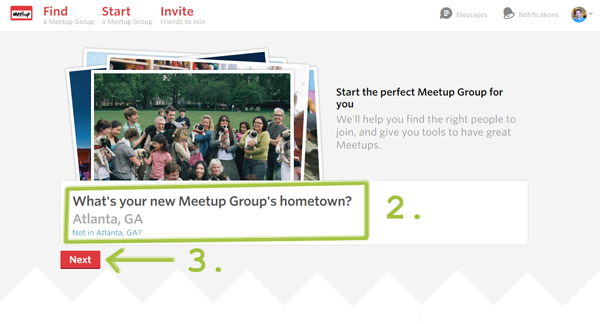
2. Then, make sure update the event location, and
3. Click “Next”.
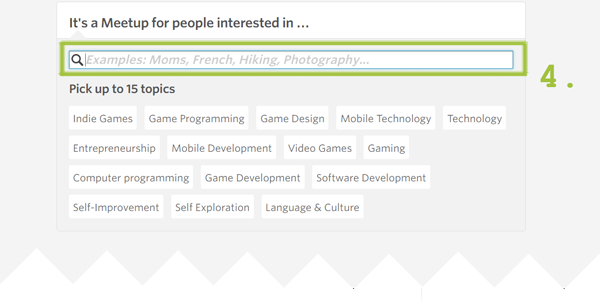
4. The next step is to pick some topics that would be interesting for your target audience.

5. Agree to their terms and conditions.
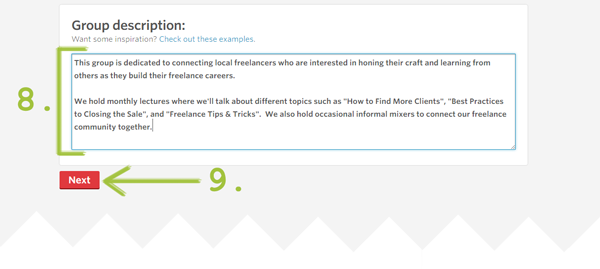
(The numbering got messed up here, so we’re jumping to 8!)
8. Next, define a simple yet descriptive group description, and
9. Click “Next”.
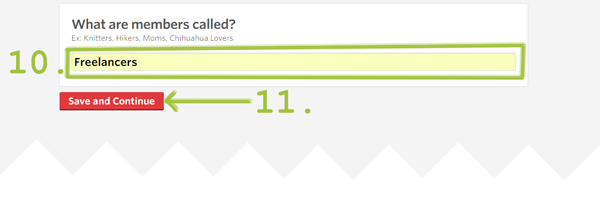
10. Define a name for your attendees. This is simply an informal way of addressing other group “members”. As you can see here, my group is for Freelancers, so I’m simply naming my attendees “Freelancers”.
11. Click “Save and Continue”.
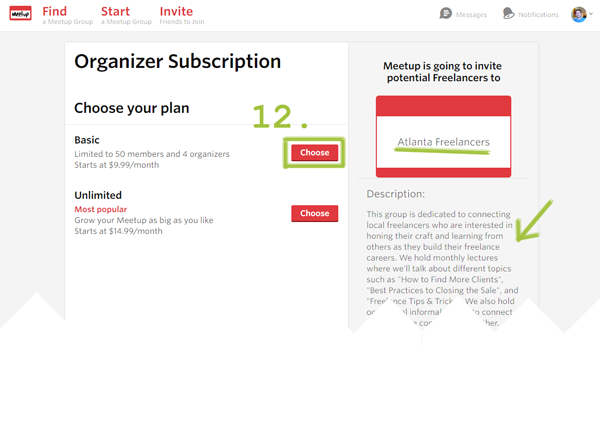
12. Choose your pricing plan. In this example, I chose the basic plan. Also while you’re here, double check the group name and the description.
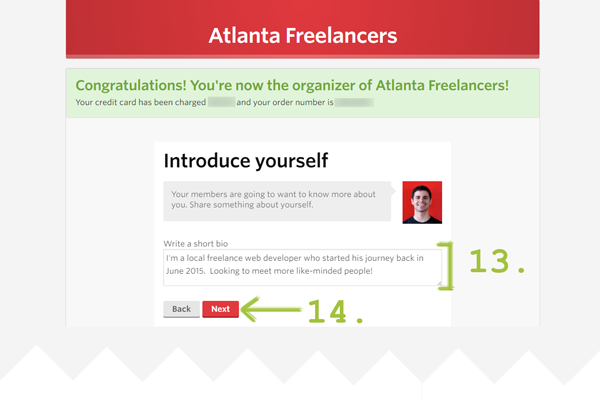
13. Write a short and interesting bio for yourself, then
14. Click “Next”.
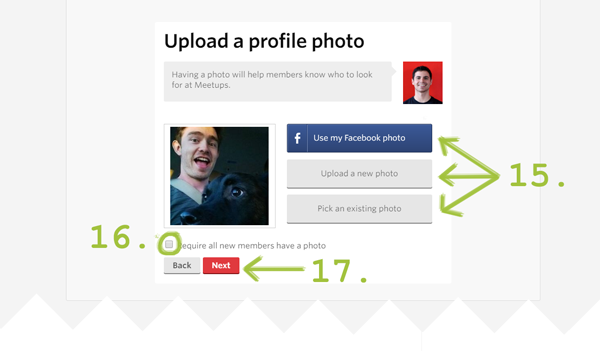
15. Add a profile photo; then
16. Decide if others’ should be forced to have one (I opted out of it for now, I suggest you do the same if you’re unsure); then
17. Click “Next” again.
Choose a picture that is relevant to the context of the meetup group, and shows off a bit of your character. People will want to know who they’re dealing with if they commit to meeting them!
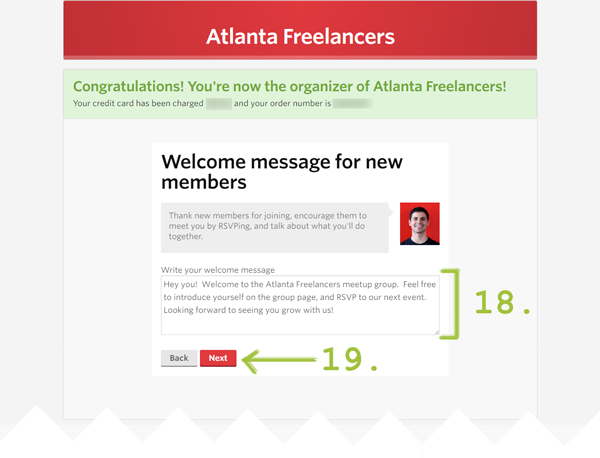
18. Type up a simple welcome message; then
19. Click “Next”.
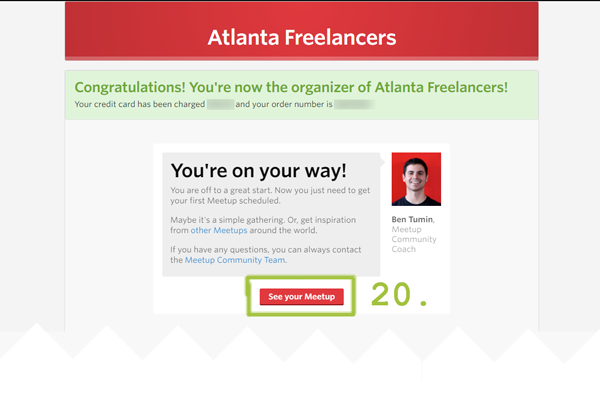
20. You’re done! Click “See your Meetup” to be taken to your Meetup overview section. There, we’ll make our first event.
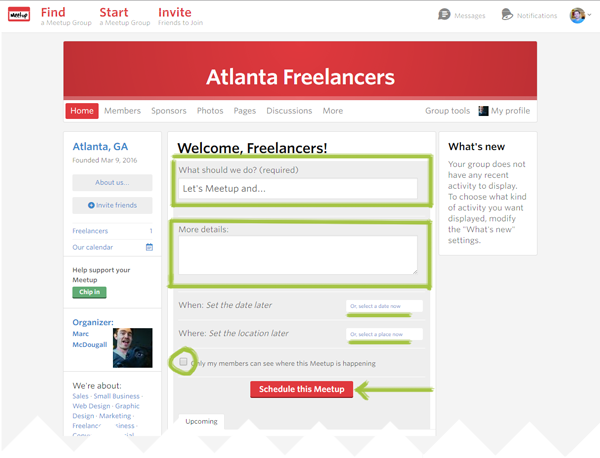
Add a title, description, time & date, and schedule your first event!
Note: As you can see, Meetup fosters regular and consistent events by using a “group” setup. This makes it a tad more complicated, though building valuable relationships is consequently much simpler through Meetup than elsewhere.
Once you’re done making your group on Meetup, the admins will send your group out to anyone that they think will be interested and people will (hopefully) flock to your event!
If you’d rather just setup a one time event however, hop on over to Eventbrite. Here’s how you host an event there:
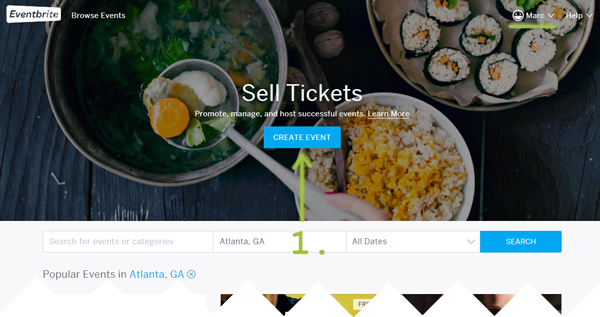
- The first step is to click the big “Create Event” button.
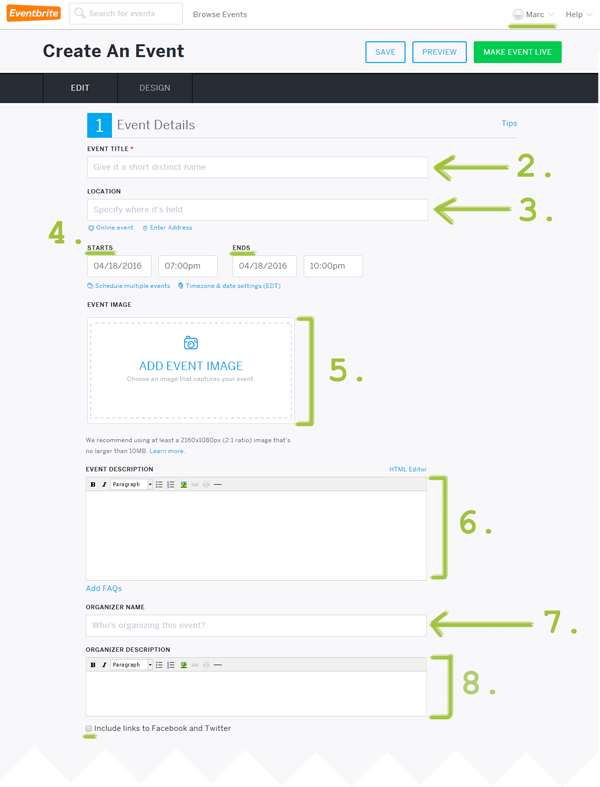
2-8. Next, fill in all the event details for your event. This includes the title, location, date & time(s), a sexy event image, a description and some info about yourself.
Note: Here’s a great resource for finding high-quality and royalty-free stock images for your event image. This will really help set you apart from the crowds of mundane events.
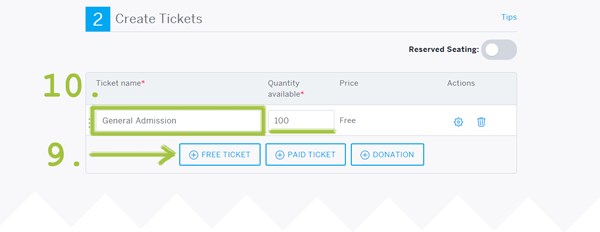
9. Scrolling down, you can create the various ticket options for your event. I recommend starting with free tickets.
10. Specify the maximum number of people you want to attend your event.
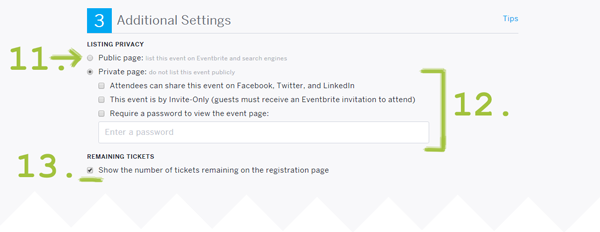
11-12. Next, make your event public or private, and
13. Let Eventbrite know if you want to make the number of remaining tickets a number that is publicly-visible.

14. Finally, make your event live!
You’ll get an email confirmation and you can get to promoting your event immediately.
| Your Social Network

When you’re first getting the word out about your event, it’s critical that there are at least 5 people there besides yourself and your business partners.
Why 5? It implies a crowd for a relatively small room, and if you can’t get at least 5, there’s something fundamentally wrong with either your format or your topic.
So, start out with the low-hanging fruit: your friends! Simply reach out to your current personal and professional network to gauge interest in the event. I’d be surprised if you don’t get at least one attendee from here.
| Other People’s Networks

Next up, leverage other people’s social networks. That’s right, get your co-owners, sponsors, employees, to share your event with anyone they know that may be interested.
Let’s say we get 1 more person from here: we’re on track!
| Your Mailing List

As we’ll discuss in the next 2 sections, cultivating your mailing list is essential to success in the modern business world.
Here’s a decent template:
![A meeting invite template to send to your email list. The text reads: "Hey guys! As some of you already know, I'm going to be hosting a quick seminar next month on [INSERT TOPIC HERE]. Here's the link if you want to join. We'll be discussing a few things: (1) sub-topic 1, (2) sub-topic 2. Hope to see you there! [Signature]](https://clarityfirst.co/wp-content/uploads/2014/03/meeting-invite-template.png)
Send a single quick blurb out to your email list with the link to your event and (if you’ve been cultivating your list well), you’ll get a quality response!
| Social Media

Finally, leverage social media to get the word out about your event. You can post the event in local Facebook groups, advertise it on LinkedIn in with some paid ads, and share it with any relevant thought-leaders on the topic.
Other Logistics
There’s a few other things you should know about creating your own networking event. Specifically:
- How much notice you should give participants.
- If you should charge for the event.
- How many people you realistically need.
- The dynamics of recurring events.
We’ll dive in and discuss them now.
| The Runway: How long should it be?
The amount of time you give participants before an event actually occurs is very important (especially when you’re just getting started).
Many influential local business owners are booked quite far in advance, so it’s important that you get in there early, but not too early because we don’t want people forgetting about the event!
When you’re just getting started, you’ll also need time to drum up awareness of the event, so keep that in mind.
I recommend that for your first event, you leave one month between the announcement of your event and the actual event occurrence.
Note: Keep your very first ever incredibly-simple (no travel, no fancy accommodations or catering), as you just want to build awareness at first.
| Should You Charge?
As always, when making any kind of marketing decision, we simply tie it back to our business goal.
Charging for the events does 3 things for you:
- Legitimizes the event;
- Allows you to afford a better venue & quality catering;
- Attracts more serious business-people that have a budget to spend on marketing.
I recommend that your first event should be free.
Then, later, if you want to attract individuals who are very serious about their growth, you should charge.
Note: It is important that the value you are providing justifies the cost. Others evaluating local networking events should be able to clearly see that there would be a significant ROI on attending your event.
| How Many People Do you Really Need?
So you’re hitting the bricks building a larger audience base. How do you know when to stop getting more attendees?
The answer is fairly simple:
- Figure out how many people you actually need at the event.
- Use the 70% rule.
Let’s first step back to the business goal: how confident are you in your ability to convert a potential customer? Could you convert 1 in 10 qualified prospects?
If your goal is 5 more customers, you need to talk to 50 people. This is the number of people you will need to talk to in an ideal world (assuming no other networking events).
Then, multiply that number by 0.7 (only about 70% of people will attend free events they RSVP to), or 0.9 (if the event is not free).

This is your target.
Note: Keep in mind that this number doesn’t account for other networking events, so it’s a super conservative estimate. Use this number as a reference, not necessarily a hard and fast rule.
| Recurring Events
Finally, you’ll probably find yourself wondering if your event should be recurring or not.
These kind of events are great for long-form sales like consulting and web design. Any big ticket sales item will require a very strong relationship with your prospects. Monthly recurring meetings is fantastic way to do exactly that.
Let’s take a quick peek at the advantages / disadvantages of this model:
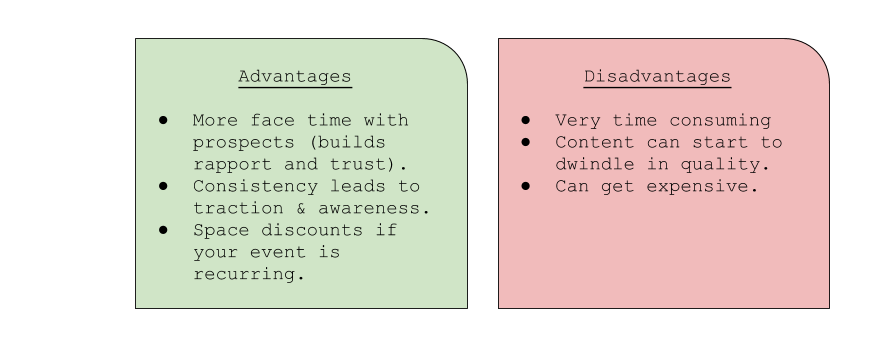
As I mentioned in the The “Quick & Easy” Solution, I recommend just starting with a simply monthly lecture event. It’s a great way to get started, a very simple structure, and helps to position yourself as an authority.
Key Takeaways
Overall, hosting your own events can be very useful for a variety of reasons. Although it’s more time consuming, it may be the only way to break into a particular niche, and it’s a fantastic way to establish yourself as an authority in a particular domain.
Call to Action: Post some of your event ideas in the comments below!
Now we’re moving on to what you do before each networking event. We’re just going to get a quick guide in place as most of the action happens during the events themselves. Onward!